


![]()
Your winning idea is super secure with our NDA

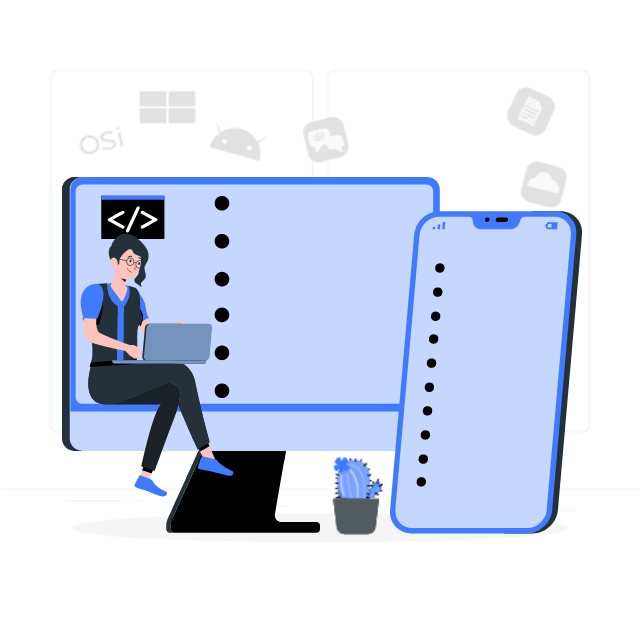
In recent years, mobile app development has progressed at an incredibly rapid rate, with almost every organization developing their own mobile app to reach customers on a larger scale.
There are several different ways to create a mobile application, and the platforms available for doing so are improving more and more each day!
Among these platforms, PhoneGap is one of the most popular open-source platforms of all, which lets developers build cross-platform mobile apps using HTML, CSS, and JavaScript so that you can create your first project in PhoneGap.
It has a JavaScript API to build functionalities into your application such as GPS, camera, etc., and also interact with them.
It’s perfectly suited to let any app development company build an app that is compatible with a number of platforms. So today we will be showing you how to create your first project in PhoneGap.
We’re going to assume your app is going to be built and tested on either an Android or iOS device. So, for an Android app, first of all, you need to change the settings to allow applications outside of the Google Play Store to be installed. To do this, follow these steps:
Go to Settings > Security > Checkmark “Allow installation of apps from unknown sources.”
In order to test PhoneGap applications on your iOS device, you would need to purchase an Apple developer account, costing $99 per year, or use the iOS simulator, if you have a Mac.
Following the on-screen instructions, you need to create a provisioning profile and signing certificate, which you should then upload to PhoneGap Build by clicking on the profile icon located at the upper-right hand corner of the PhoneGap Build site to create your first project in PhoneGap.
Go to the “Edit Account” option and choose the “Signing Keys” tab. Owing to the new rules, you will need to re-enter the password each month to unlock it.
Although you’d need an actual PhoneGap Build account to properly build your app, you can use the free account till then.
You can use any editor you want, however, we would recommend you use Brackets, which is a free, open-source code editor for HTML, CSS as well as JavaScript apps, created by Adobe. Adobe has also released an open-source Brackets extension for PhoneGap Build support which you can download free of cost!
Since this is only a demo, you can just use the starter template from GitHub, and download a zip file of the starter application now. Now you’re all set up and ready to start!
Accessing your PhoneGap Build account, now you can create a new app in the form by clicking “Upload a zip file.” Next, you need to check the “Enable Debugging” and “Enable Hydration” options, and finally, click on the “Ready to Build” button.
PhoneGap Build will now start working to compile the builds for its various supported platforms, but you’ll see that the iOS icon is red.
If you followed the previous steps and have a signing key setup, then you can just click on the project name, and edit it to choose the signing key you added.
Now PhoneGap Build will start building your app for iOS. Once you have it, you need to scan the QR code for this project using a QR code scanning app (any will do).
On Android, this will prompt a download, and once it is complete, you need to select it via the notifications pull-down and choose “Install”, like any other app, and then just open it.
On iOS, on the other hand, you will get a notification to install the app, so you need to click the “Install” button so that even you can create your first project in PhoneGap.
Once you have it, you need to scan the QR code for this project using a QR code scanning app (any will do). On Android, this will prompt a download, and once it is complete, you need to select it via the notifications pull-down and choose “Install”, like any other app, and then just open it.
On iOS, on the other hand, you will get a notification to install the app, so you need to click the “Install” button.
Now we will start building our app using simple HTML/JS code without any frameworks to create your first project in PhoneGap.
We will add jQuery Mobile later. In the sample starter application, we need to open the index.html file and remove everything other than the code inside the <body> tags, replacing <div> with the id of “allrepos”. It will look like this:
<div id="allRepos"></div>We also need to replace the viewport meta tag to make sure that the content doesn’t show up excessively small. This is what it will look like:
<meta name="viewport" content="width=device-width, initial-scale=1">Now we will be adding the XHR request for the GitHub to the deviceready method in js/index.js. This will request the data needed from the GitHub API, returning it in a JSON format.
First of all, First, you should remove any existing JavaScript code within the deviceready method, and then add the following code within the deviceready function:
var xhr = new XMLHttpRequest();
 xhr.open('GET', 'https://api.github.com/legacy/repos/search/javascript', true);
  // Response handlers.
  xhr.onload = function () {
     var repos = JSON.parse(xhr.response), i, reposHTML = "";
     for (i = 0; i < repos.repositories.length; i++) {
       reposHTML += "<p><a href='https://github.com/" + repos.repositories[i].username + "/" + repos.repositories[i].name + "'>" + repos.repositories[i].name + "</a><br>" + repos.repositories[i].description + "</p>";
     }
     document.getElementById("allRepos").innerHTML = reposHTML;
  };

  xhr.onerror = function () {
     alert('error making the request.');
  };

xhr.send();
Since this is just a sample to make your job easier, you can feel free to customise it any way you wish. Before you upload it to PhoneGap Build, you need to test the app by simply loading it in your browser via your localhost.
As this is not running on a device, you need to manually trigger the app.deviceready() method via the developer tools of whichever browser you are using by typing app.deviceready() into the console so that you can create your first project in PhoneGap.
At this stage, you should modify the config.xml file to have the correct information, like the app name, author details, or even the description. T
he config.xml file allows you to customise things like your app title, the icons which it will use on different platforms, and even the splash screen which will be displayed while the app is loading. You can also assign your app a unique app id and manage the version numbers.
Apart from this, you can even specify platform-specific options and select which features are required by your application (e.g. camera, contacts, geolocation).
Once you’re done, you can just zip up the results and upload it to your PhoneGap Build project, and then update it on your phone.
If you want to debug your app for errors, you need to open the app on your device and then click the debug button, opening up debug.phonegap.com in a new tab.
You can inspect or modify the HTML and CSS styles, and while choosing selections in the HTML, you can see it highlighted in the app running on your device so that you can create your first project in PhoneGap.
You can even see anything logged to the console or use the console to enter statements and test scripts the way you would in the browser console. Next, we need to make our PhoneGap app look and feel more like a real mobile app using jQuery Mobile.
First of all, we would need to add the CDN hosted scripts for jQuery and jQuery Mobile by following the instructions on the jquerymobile downloads page, and then add the following HTML code below the existing stylesheet link within index.html:
<link rel="stylesheet" href="http://code.jquery.com/mobile/1.3.0/jquery.mobile-1.3.0.min.css" />
<script src="http://code.jquery.com/jquery-1.8.2.min.js"></script>
<script src="http://code.jquery.com/mobile/1.3.0/jquery.mobile-1.3.0.min.js"></script>
We also need to add in the reference to phonegap.js, by adding the following:
<script src="phonegap.js"></script>Nextly, you should replace the straight JavaScript XHR code for a much simpler jQuery version in index.js, and in index.html, get rid of the script block that references app.initialize():
$.ajax("https://api.github.com/legacy/repos/search/javascript").done(function(data) {
     var i, repo;
     $.each(data.repositories, function (i, repo) {
        $("#allRepos").append("<p><a href='https://github.com/" + repo.username + "/" + repo.name + "'>" + repo.name + "</a><br>"+ repo.description + "&glt;/p>");
     });
});
Once this is done, you need to replace the div with the ID of “allRepos” using the following HTML:
<div id="reposHome" data-role="page">
    <div data-role="header" data-position="fixed">
        <h1>GitHub Search</h1>
    </div>
    <div data-role="content">
        <ul id="allRepos" data-role="listview"  data-filter="true">
        </ul>
    </div>
</div>
You can also modify the JavaScript in index.js to use list items instead of paragraphs, or add additional project details to the output to create your first project in PhoneGap. Your index.js should look something like this in the end:
$('#reposHome').bind('pageinit', function(event) {
    loadRepos();
});

function loadRepos() {
    $.ajax("https://api.github.com/legacy/repos/search/javascript").done(function(data) {
        var i, repo;
        $.each(data.repositories, function (i, repo) {
            $("#allRepos").append("<li><a href='https://github.com/" + repo.username + "/" + repo.name + "'>"
            + "<h4>" + repo.name + "</h4>"
            + "<p>" + repo.username + "</p></a></li>");
        });
        $('#allRepos').listview('refresh');
    });
}
Once you’re done, now you can test it in the browser and your device. For this, you can use the Ripple Emulator, so you should first install it from the Chrome webstore.
Now you can go to emulate.phonegap.com and enter the URL which you would like to emulate and test. Since we are running our app locally using a local web server, we can just use our localhost address and emulate our application when you create your first project in PhoneGap.
Now you need to create a new page in your code editor, called repo-detail.html. This will be the contents of the page:
<!DOCTYPE HTML>
<html>
<head>
</head>

<body>

<div id="reposDetail" data-role="page" data-add-back-btn="true">

    <div data-role="header">
        <h1>Repository Details</h1>
    </div>

    <div data-role="content">
        <div id="repoDetails">
            <h3 id="repoName"></h3>
            <p id="description"></p>
            <p id="forks"></p>
        </div>
        <div id="ownerDetails">
            <img id="avatar" align="left" style="padding-right: 5px;" />
            <h3 id="ownerName"></h3>
        </div>
    </div>

</div>

</body>
Now, in index.js, you need to change the link for each list item so that it uses the new page instead of the project’s GitHub repository:
function loadRepos() {
    $.ajax("https://api.github.com/legacy/repos/search/javascript").done(function(data) {
        var i, repo;
        $.each(data.repositories, function (i, repo) {
            $("#allRepos").append("<li><a href='repo-detail.html?owner=" + repo.username + "&name=" + repo.name + "'>"
            + "<h4>" + repo.name + "</h4>"
            + "<p>" + repo.username + "</p></a></li>");
        });
        $('#allRepos').listview('refresh');
    });
}
Next, you need to to parse the URL variables on the subsequent page, for which, you can use a function called getURLVars():
function getUrlVars() {
    var vars = [], hash;
    var hashes = window.location.href.slice(window.location.href.indexOf('?') + 1).split('&');
    for(var i = 0; i < hashes.length; i++)
    {
        hash = hashes[i].split('=');
        vars.push(hash[0]);
        vars[hash[0]] = hash[1];
    }
    return vars;
}
Now you can bind an action to jQuery Mobile’s pageshow event, which will be triggered when the new page is added to the DOM.
After this event is fired, we will make a call to the GitHub API get repository method to request the full details of the selected project and create your first project in PhoneGap. This can be done by adding the following code to index.js:
$('#reposDetail').live('pageshow', function(event) {
    var owner = getUrlVars().owner;
    var name = getUrlVars().name;
    loadRepoDetail(owner,name);
});

function loadRepoDetail(owner,name) {
     $.ajax("https://api.github.com/repos/" + owner + "/" + name).done(function(data) {
         console.log(data);
     });
}
Now you’re ready to run this in the browser and add in some of the details text. You can add styling and/or any other detail items which are not there in the sample code below to make your app even more useful:
function loadRepoDetail(owner,name) {
     $.ajax("https://api.github.com/repos/" + owner + "/" + name).done(function(data) {
         var repo = data;
         console.log(data);

         $('#repoName').html("<a href='" + repo.homepage + "'>" + repo.name + "</a>");
         $('#description').text(repo.description);
         $('#forks').html("<strong>Forks:</strong> " + repo.forks + "<br><strong>Watchers:</strong> " + repo.watchers);

         $('#avatar').attr('src', repo.owner.avatar_url);
         $('#ownerName').html("<strong>Owner:</strong> <a href='" + repo.owner.url + "'>" + repo.owner.login + "</a>");
     });
}
You are now ready to test the app in the browser, and if you are satisfied with the what you see, you can zip it up and upload it to PhoneGap Build.
In this stage, the first thing to do is add some JavaScript code to create our local database on jQuery Mobile’s “pageinit” event to create your first project in PhoneGap. You will need to add this code to index.js with “pageinit” event binding below overwriting the existing method:
var db;

$('#reposHome').bind('pageinit', function(event) {
    loadRepos();
    db = window.openDatabase("repodb","0.1","GitHub Repo Db", 1000);
    db.transaction(createDb, txError, txSuccess);
});

function createDb(tx) {
    tx.executeSql("DROP TABLE IF EXISTS repos");
    tx.executeSql("CREATE TABLE repos(user,name)");
}

function txError(error) {
    console.log(error);
    console.log("Database error: " + error);
}

function txSuccess() {
    console.log("Success");
}
In order to allow the user to save a project as a favourite, we will now add a button in repo-detail.html to the page header:
<button id="saveBtn" data-icon="star" class="ui-btn-right">Save as Favorite</button>Nextly, we need to add the following code to index.js:
function saveFave() {
    db = window.openDatabase("repodb","0.1","GitHub Repo Db", 1000);
    db.transaction(saveFaveDb, txError, txSuccessFave);
}

function saveFaveDb(tx) {
    var owner = getUrlVars().owner;
    var name = getUrlVars().name;

    tx.executeSql("INSERT INTO repos(user,name) VALUES (?, ?)",[owner,name]);
}

function txSuccessFave() {
    console.log("Save success");

    disableSaveButton();
}
Next, add the following line within our existing “pageshow” handler for the reposDetail page:
$("#saveBtn").bind("click", saveFave);After you’re done, add a line to call to a new method in our “pageshow” event handler for reposDetail:
checkFave();Since the local database functionality already works within your browser, you can now test this in the browser first to check whether everything works and create your first project in PhoneGap.
Once you’ve confirmed that everything functions properly, zip up your project and upload it to PhoneGap Build, open the app on your device, and update it.
This is the final step, in which, we will add a finishing touch to our application and use another PhoneGap API for notifications to create a native popup. First of all, create a simple page to list the saved items, naming it faves.html:
<!DOCTYPE HTML>
<html>
<head>
</head>

<body>
    <div id="favesHome" data-role="page" data-add-back-btn="true">
        <div data-role="header" data-position="fixed">
            <h1>Saved Items</h1>
        </div>
        <div data-role="content">
            <ul id="savedItems" data-role="listview"  data-filter="true">
            </ul>
        </div>
    </div>
</body>
</html>
Next, you can add a navigation button to the home page header to navigate to our new page:
<div data-role="header" data-position="fixed">
<h1>GitHub Search</h1>
<a href="faves.html" class="ui-btn-right" data-icon="arrow-r">Saved Items</a>
</div>
Now we need to load the saved items into the list when the page, favesHome, loads via the “pageshow” event. For this, add this to index.js:
$('#favesHome').live('pageshow', function(event) {
    db.transaction(loadFavesDb, txError, txSuccess);
});

function loadFavesDb(tx) {
    tx.executeSql("SELECT * FROM repos",[],txSuccessLoadFaves);
}
Also, add this code to index.js:
function txSuccessLoadFaves(tx,results) {
    console.log("Read success");

    if (results.rows.length) {
        var len = results.rows.length;
        var repo;
        for (var i=0; i < len; i = i + 1) {
            repo = results.rows.item(i);
            console.log(repo);
            $("#savedItems").append("<li><a href='repo-detail.html?owner=" + repo.user + "&name=" + repo.name + "'>"
            + "<h4>" + repo.name + "</h4>"
            + "<p>" + repo.user + "</p></a></li>");
        };
        $('#savedItems').listview('refresh');
    }
}
We will now add a notification that lets the user know that nothing has been saved. In order to do that, we will use the PhoneGap notification API to launch a native popup and create your first project in PhoneGap.
You can now change the txSuccessLoadFaves() method from earlier and add in an else to the if statement block:
else {
   if (navigator.notification)
            navigator.notification.alert("You haven't saved any favorites yet.", alertDismissed);

}
The if statement was added around our notification API call so that it does not give an error when tested in the browser. However, since this API uses native alerts, it will not show in the browser and you will need to run it on a device to see it function properly.
The notification API allows you to define a callback handler for when the alert is dismissed to create your first project in PhoneGap.
We will now create this callback handler, and in it, we’ll use the jQuery Mobile method to navigate the user back to the homepage, since we have no favorites to display for them:
function alertDismissed() {
    $.mobile.changePage("index.html");
}

![]()
Your winning idea is super secure with our NDA
![]()
Your winning idea is super secure with our NDA
Your winning idea is super secure with our NDA